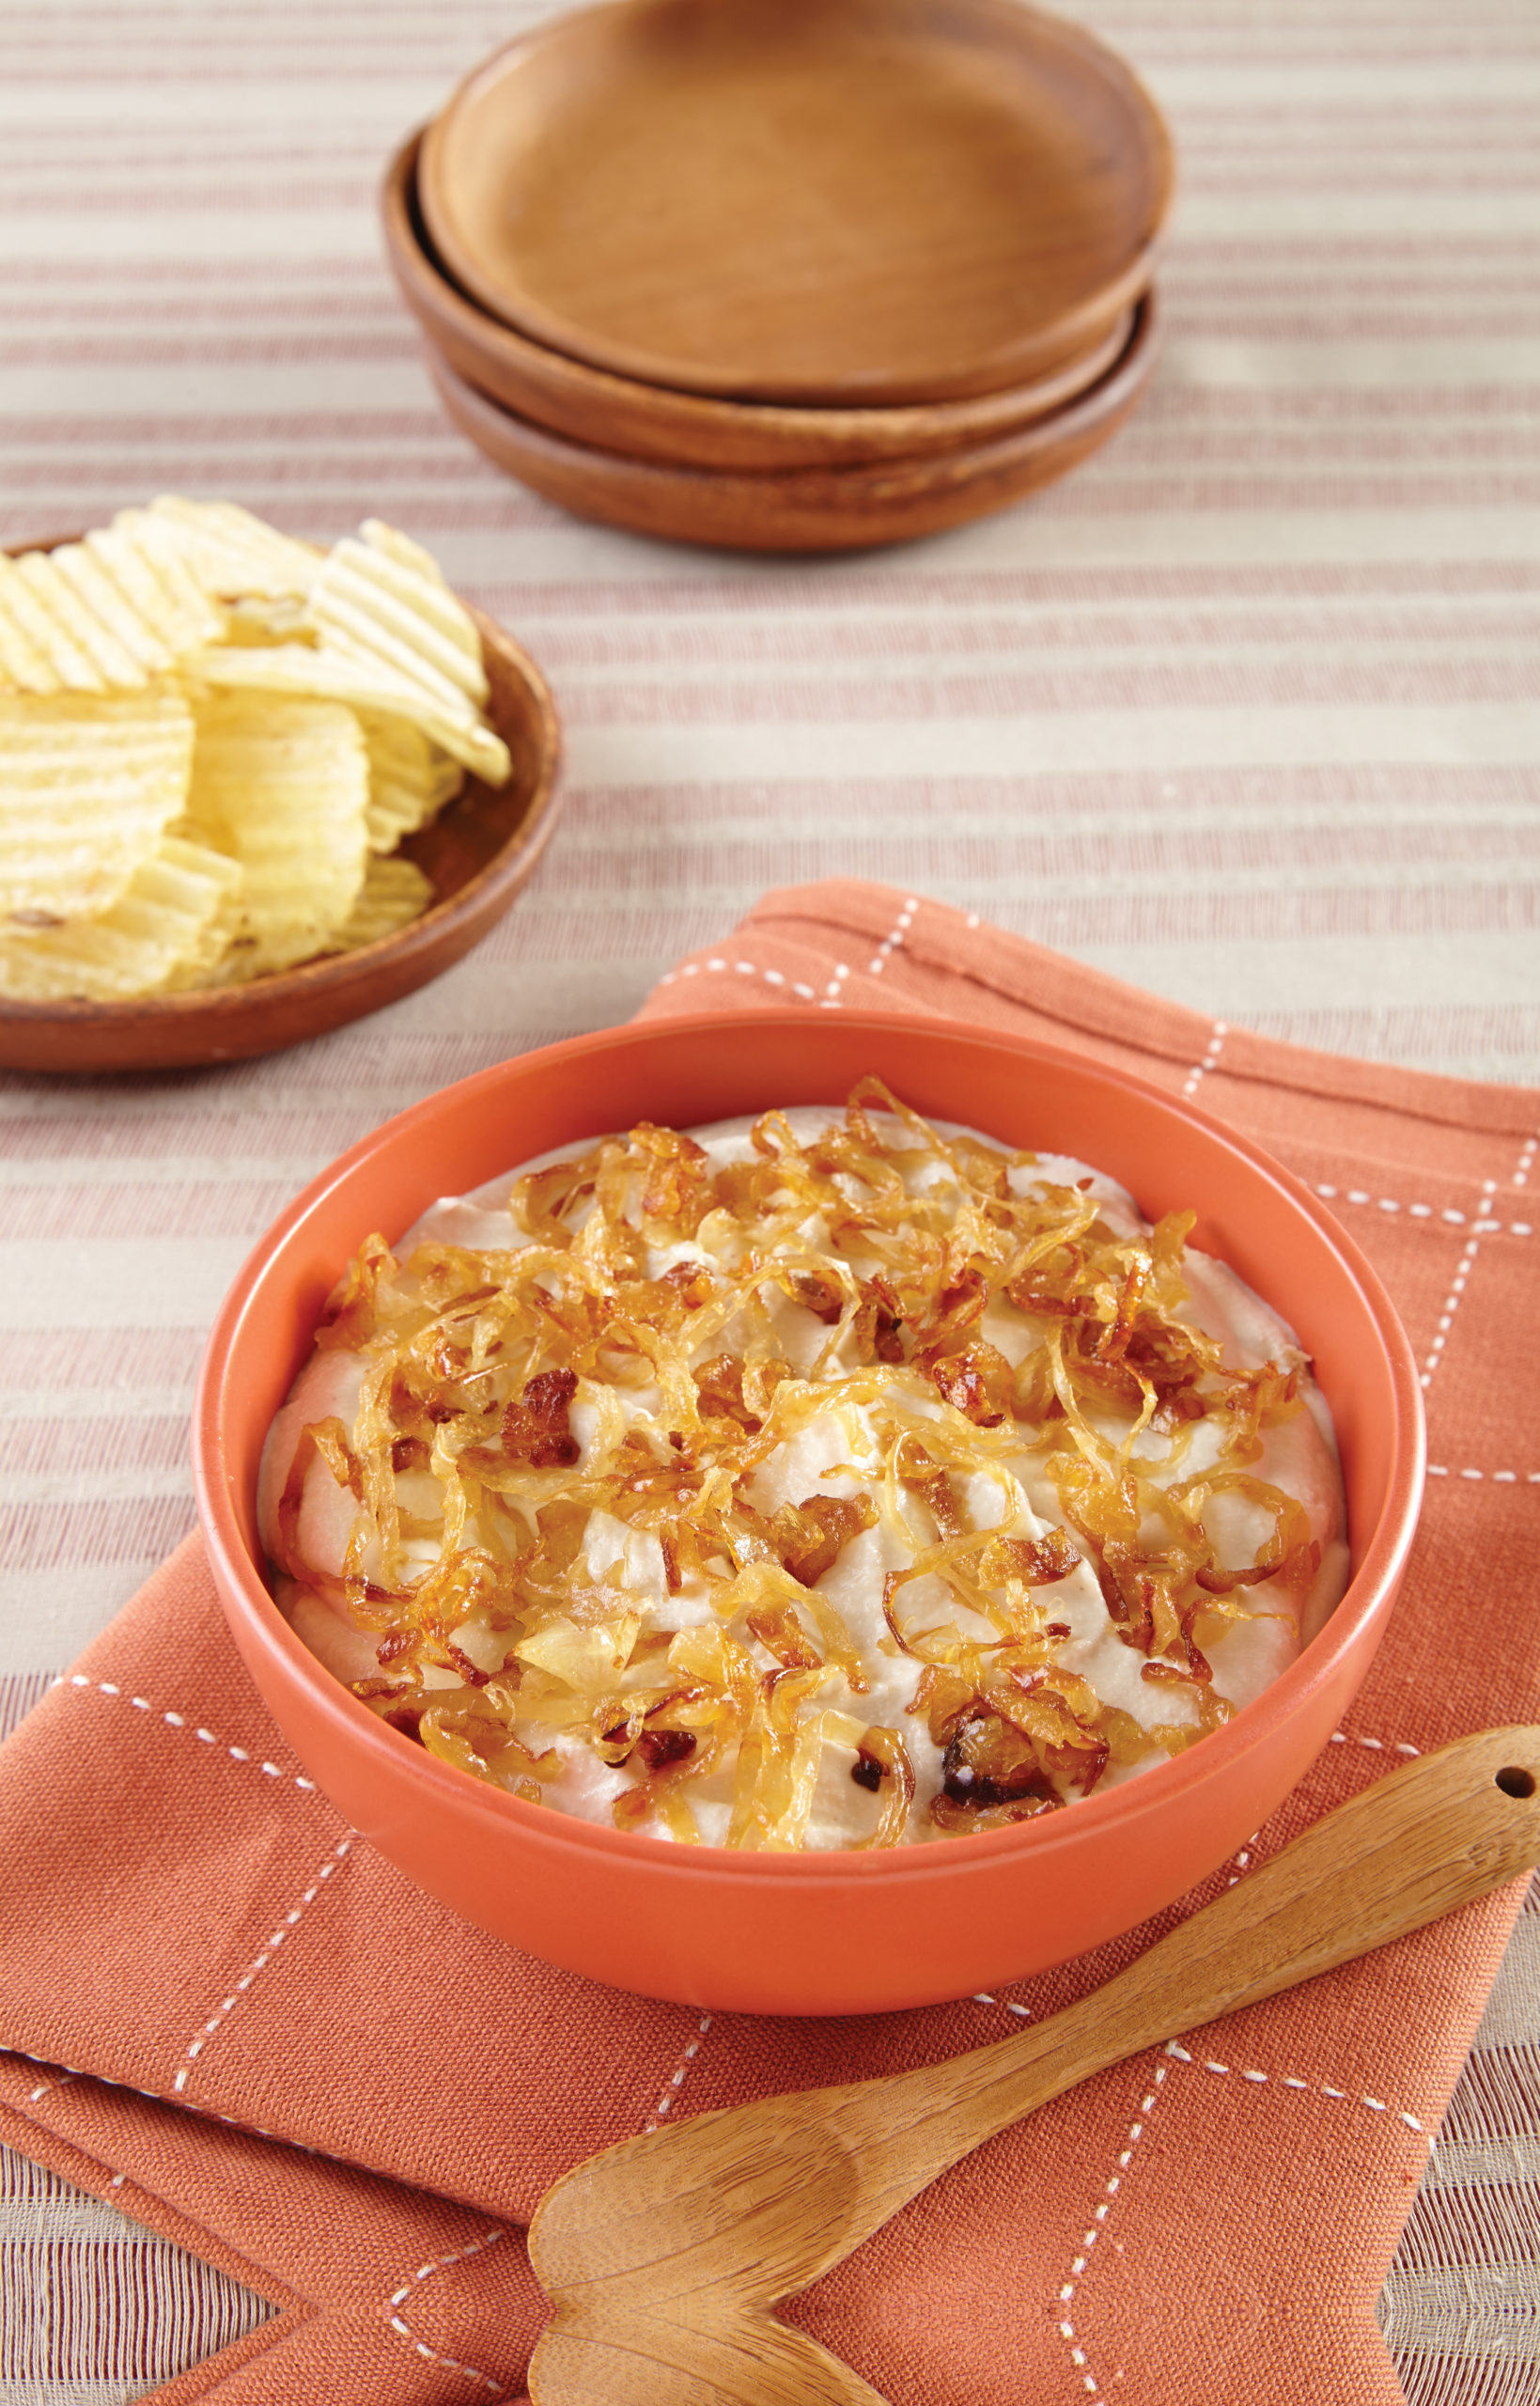
Whole Grain Vegan Baking & Giveaway!

I am so excited to be a stop on the Whole Grain Vegan Blog Tour! for the awesome new cookbook by Celine Steen and Tamasin Noyes. It is an absolutely gorgeous book, full of delicious, easy-to-make, whole grain recipes and stunning photographs. It is another “must-have” for your cookbook collection. And hey, haven’t you been saying that you need to be doing more whole grain baking?

Celine and Tami, along with their awesome publishers, are letting me share a recipe from the book, for a delicious Spicy Cranberry Cornbread. And, they are also generously giving away a copy, to anyone is the US or Canada. All you have to do to win is leave a comment below (along with a way to get in touch with you should you win). I can’t wait to see what you guys think of this very cool book.

Seriously you guys, this is a very special book! Now, what are you waiting for? Go bake yourself a pan of the Spicy Cranberry Cornbread right now! You’ll be so happy you did! I am going to try to make a batch sans gluten very soon. I’ll let you know how it comes out.

 Spicy Cranberry Cornbread

A wee bit sweet, a wee bit spicy, and all very savory, this cornbread has the perfect crust thanks to the hot cast-iron skillet. Cornmeal is packed with nutrients, minerals, and amino acids. Plus, it tastes great! Start with this recipe, then tweak it to your taste. Double the scallions, jalapeños, or cranberries to make it your own.

11⁄2 cups (355 ml) unsweetened plain vegan milk, more if needed
1 tablespoon (15 ml) apple cider vinegar
60 g (1⁄4 cup) unsweetened applesauce
2 tablespoons (30 ml) pure maple syrup
18 g (3 tablespoons) minced scallion
18 g (2 tablespoons) minced jalapeno pepper
15 g (2 tablespoons) dried sweetened cranberries, chopped
1 tablespoon (15 ml) neutral-flavored oil
120 g (1 cup) whole wheat pastry flour
60 g (1⁄2 cup) corn flour (see page 10)
88 g (1⁄2 cup plus 2 tablespoons) coarsely ground cornmeal
1 teaspoon fine sea salt
1⁄4 teaspoon ground black pepper
12 g (1 tablespoon) baking powder
Nonstick cooking spray

Put an 8-inch (20 cm) cast-iron skillet in the oven and preheat the oven to 400°F (200°C, or gas mark 6).

Combine the milk and vinegar in a medium-size bowl: The mixture will curdle and become like buttermilk. Stir in the applesauce, syrup, scallion, jalapeño, cranberries, and oil.

Combine the flours, cornmeal, salt, pepper, and baking powder in a second medium-size bowl. Whisk to combine. Pour the wet ingredients into the dry and stir until combined, but do not overmix. If the mixture is too dry, add additional milk 1 tablespoon (15 ml) at a time as needed. The mixture should be pourable.

Carefully take the skillet out of the oven and coat it with cooking spray.

Pour the cornbread batter into the skillet and put it back in the oven. Bake for 33 to 38 minutes, until a toothpick inserted into the center comes out clean. Let cool slightly before serving.

Yield: 6 servings

Next stop on the blog tour: May 26: Vegan Cookbooks Illustrated    http://vegan-cookbooks-illustrated.blogspot.com/

Share and Enjoy:
  • Twitter
  • Facebook
  • Digg
  • StumbleUpon
  • del.icio.us
  • Yahoo! Buzz
  • Google Bookmarks
  • FriendFeed
  • Tumblr
  • Identi.ca
  • Print
  • email
  • Add to favorites

{ 18 comments }

We Have A Winner!

Thank you to everyone who entered the giveaway. We have a winner, chosen by the Random Number Generator. And, the winner is… The Peace Patch. If you can please email me ASAP (at blog@everydaydish.tv), we’ll get your book sent out to you.

I’ve got two more cookbook giveaways over the next couple of weeks (I know, right), so be sure to check back.

xo Julie

Share and Enjoy:
  • Twitter
  • Facebook
  • Digg
  • StumbleUpon
  • del.icio.us
  • Yahoo! Buzz
  • Google Bookmarks
  • FriendFeed
  • Tumblr
  • Identi.ca
  • Print
  • email
  • Add to favorites

{ 1 comment }

Southern-Style Soul Food, Vegan Style

This is a special post today, because not only do we have a guest blogger, but she’s also sharing a recipe, and… doing a book giveaway! This is a book that I have been really loving, and am so excited to do a giveaway (for US and Canadian residents). Just make sure to leave a comment with your name (and email address so we can reach you), and tell us what recipe you’ve been wanting to veganize.,

And now I want to introduce you to the fabulous cookbook author and blogger Bianca Phillips….

Hi y’all! I’m Bianca, author of Cookin’ Crunk: Eatin’ Vegan in the Dirty South and the Vegan Crunk food blog. Julie asked me to guest post and fill y’all in on a few tips for veganizing Southern-style soul food.

No matter what region of the world you call home, few can resist a steaming bowl of collard greens, a buttery slice of sweet cornbread, or a heaping platter of fluffy buttermilk biscuits smothered in creamy gravy. Those are just a few of the comforting Southern staples my little region has contributed to the food world. Sadly, most soul food joints put ham hocks in those greens, eggs in that cornbread, and milk in that gravy.

But never fear! Vegan soul food is here! In my first cookbook, Cookin’ Crunk, I’ve included about 150 cruelty-free recipes for traditional Southern staples. Chicken-fried steak becomes country-fried tempeh steak. Fried catfish becomes baked tofu fish. And BBQ pork ribs become BBQ seitan ribs. You get the idea.

Anyway, I’m here today to share with y’all a few tips I’ve learned along the way while veganizing Southern fare. And I’ll provide a recipe from the book too!

1) Liquid smoke is your best friend.

I couldn’t have written my book without liquid smoke. This smoky, hickory-flavored liquid is great for adding that bacony flavor so often imparted into soul food through ham hocks and bacon fat (grody!). No need to harm pigs for flavor. Just add a splash of liquid smoke to greens, soup beans, or homemade barbecue sauce.

2) Cajun seasoning is your other best friend.

You know how you have your real old-school bestie and your newer friends who make great stand-ins for besties since your original best friend moved miles away after college? Cajun seasoning is like those newer best friends. He’s no liquid smoke. But he’s damn tasty, and he’ll season up your food just fine and maybe even add a little fieriness that your original best friend (in this case, liquid smoke) never could. And sometimes, when your real best friend is visiting from out of town, all three of you get together and have the time of your lives. All this is to say that Cajun seasoning is great for adding a little Southern flair to soups, stews, and even sweet tater fries.

3) Fried food DOES NOT need egg batter.

So often, battered, fried veggies — squash, green tomatoes, onion rings, etc. — are coated in an egg wash before breading to help the flour coating stick. But that’s just not necessary. Although they may not be the healthiest recipes in my book, I have included some fried recipes. And they are all egg-free. Mix together soymilk (or coconut drinking milk) and vinegar and allow to curdle and thicken like buttermilk. And then dip veggies in the vegan buttermilk before dipping anything into a flour breading mixture. Repeat this process at least once to ensure a thicker coating. (And while I love other plant milks for most things, I have found that soymilk and coconut milk work best for curdling and coating).

I could go on and on all day, but since I promised a recipe, I’ll stop here and dish the goods.

BBQ “Pulled” Tempeh & Carrot Sandwich

From Cookin’ Crunk; Eatin’ Vegan in the Dirty South

Yields 2 sandwiches

1 8-ounce package tempeh

1 tablespoon canola oil

3 tablespoons minced red onion

2 cloves garlic, minced

2 carrots, grated

1/2 cup barbecue sauce

Extra barbecue sauce for dressin’

Creamy Poppy Seed Coleslaw (recipe below)

2 whole wheat buns, toasted

Slice the tempeh into about 10 medium-sized strips. Place the tempeh into a steamer basket with a little water in the bottom. Steam for 10 minutes. If you don’t have a steamer basket, place the tempeh directly into a little water in a saucepan and heat for about 10 minutes. Set aside.

Heat the oil in a large skillet on medium-high heat. When the oil is hot, add the onion and cook for 2 to 3 minutes or until soft. Add the garlic and cook for 1 more minute. Add the shredded carrot and sauté for about 5 more minutes or until carrot is soft.

Crumble the steamed tempeh into the skillet and brown for about 5 minutes. Stir in 1/2 cup of the barbecue sauce and continue to cook for about 1 minute. Remove from heat. To assemble, divide the tempeh over the bottoms of two toasted buns. Top with extra sauce and coleslaw and the tops of the bun halves.

Creamy Poppy Seed Coleslaw

From Cookin’ Crunk; Eatin’ Vegan in the Dirty South

Yields 3 1/2 cups

3 cups shredded cabbage (about half of a medium-sized head)

1 carrot, grated

2 tablespoons minced red onion

1/2 cup vegan mayonnaise

1 teaspoon agave nectar

1/2 teaspoon sea salt

1/2 teaspoon poppy seeds

Place the shredded cabbage, grated carrot, and minced red onion into a large mixing bowl. Stir in the vegan mayonnaise, agave nectar, salt, and poppy seeds. Refrigerate until ready to serve.

Disclosure: I was provided with a copy of the book to review and giveaway. All opinions are my own.

Share and Enjoy:
  • Twitter
  • Facebook
  • Digg
  • StumbleUpon
  • del.icio.us
  • Yahoo! Buzz
  • Google Bookmarks
  • FriendFeed
  • Tumblr
  • Identi.ca
  • Print
  • email
  • Add to favorites

{ 32 comments }

We Have Three Winners

Thanks to everyone who entered the giveaway. I have 3 winners (courtesy of the Random Number Generator), who will all receive a coupon to try the new Nasoya Nayonaise. Congratulations to Erica C, Jill, and Bettina! Please email me your shipping address at blog@everydaydish.tv ASAP, so that we can mail out your free coupons!

And, come back tomorrow, because I have a special guest post and another giveaway. This time it’s a cookbook!

xo Julie

Share and Enjoy:
  • Twitter
  • Facebook
  • Digg
  • StumbleUpon
  • del.icio.us
  • Yahoo! Buzz
  • Google Bookmarks
  • FriendFeed
  • Tumblr
  • Identi.ca
  • Print
  • email
  • Add to favorites

{ 1 comment }

Another Giveaway!

Nayonaise

I told you I’d be back for another giveaway…

I was really excited when the folks at Nasoya asked if I would be interested in trying out the newly re-vamped Nayonaise mayos. One is a sandwich spread that is similar in taste to Miracle Whip, and the other is a regular mayo-type spread. It only has 3.5 grams of fat per tablespoon, which is nice, because it takes the guilt factor out of the equation. The mayos worked really well in an eggless tofu olive salad that I made (from the excellent cookbook Cookin’ Crunk), a spicy sesame tofu salad to put in sushi, and a regular eggless egg salad. I can see myself using Nayonaise regularly. They are also made with expeller-pressed oil, are non-GMO, gluten-free, egg-free, dairy-free and cholesterol-free too. The texture is thick, but not creamy in a traditional oily mayo kind of way. It’s more of a creamy gel. I gave it a good stir, and it worked great in the recipes I tried. I think the more vegan mayo choices we have at the store, the better. Especially with summer salad season coming up.

And guess what else? Nasoya has given me three free coupons to give away to my readers! All you have to do is leave a comment (with an email address so I can reach you should you win). I’d also love to hear what recipe you would use the mayo in. The contest will be open until this Thursday (April 25th), for those in the U.S. Good luck!

Disclosure: Nasoya has provided me with both products to sample and review, plus the coupons for giveaway. All opinions are my own.

Share and Enjoy:
  • Twitter
  • Facebook
  • Digg
  • StumbleUpon
  • del.icio.us
  • Yahoo! Buzz
  • Google Bookmarks
  • FriendFeed
  • Tumblr
  • Identi.ca
  • Print
  • email
  • Add to favorites

{ 40 comments }

We Have A Winner

We have a winner for the So Delicious coupon giveaway. Congratulations Lori! Lori, please email me at blog@everydaydish.tv ASAP, and I will mail you out your free coupon. Thank you to everyone who participated. I wish I had enough coupons to send one to each of you: ) I will be posting another giveaway this afternoon (hopefully), so check back and enter that one as well. I seriously have a lot of giveaways coming up!

xo Julie

Share and Enjoy:
  • Twitter
  • Facebook
  • Digg
  • StumbleUpon
  • del.icio.us
  • Yahoo! Buzz
  • Google Bookmarks
  • FriendFeed
  • Tumblr
  • Identi.ca
  • Print
  • email
  • Add to favorites

{ 0 comments }

A New Coconut Creamer and Giveaway

SoDelicious

I am so behind on some reviews that I’ve been wanting to do, so here is the first of many…

I was so excited when I was asked if I was interested in trying out the new shelf-stable Barista Style So Delicious coconut milk creamer, and unsweetened vanilla coconut milk. Not only do I love So Delicious products, but I love the ease of having milk and creamer in my pantry, so when I’m working on recipes I don’t have to run to the store.

The new milk and creamer did not disappoint. In fact, I absolutely adore the new milk. It has such a rich and delicious flavor. The same with the Barista Style Creamer. I’m already dying to try them in homemade ice creams, puddings and custards. They are really delicious! As I’m typing this, I am sipping the milk that I used in the photo. It almost tastes like cream. Yum!

As a special treat, So Delicious gave me a coupon to give out to one of my readers. All you have to do to enter is leave a comment (and your name and way for me to reach you should you win), and tell me what you would like to make with the new creamer or vanilla coconut milk. I will pick a winner on Monday, April 22nd.

And, don’t forget to check back. I’ve got a number of fun giveaways coming up, including a handful of cookbooks too. I’m making up for my blogging hiatus, by giving my readers some of my favorite things!

Disclosure: So Delicious has provided me with both the product to sample and review, plus the coupon for giveaway; however, I truly adore this brand and their products are delicious. All opinions are my own.

Share and Enjoy:
  • Twitter
  • Facebook
  • Digg
  • StumbleUpon
  • del.icio.us
  • Yahoo! Buzz
  • Google Bookmarks
  • FriendFeed
  • Tumblr
  • Identi.ca
  • Print
  • email
  • Add to favorites

{ 24 comments }

A Quick And Delicious Chili Recipe

I always have the highest hopes of blogging regularly. I know that it will happen, it’s just so easy for life to get in the way. I’m sure I’m not alone with this. In my perfect blogger fantasy, I am sitting at my desk every morning, relaxed with a nice steamy cup of tea, typing away. In reality, it looks something like this: Wake up in the morning and run to the kitchen, bleary-eyed, to get a pot of coffee going. Realize that I forgot to wash the coffee pot, and grind beans. Take care of both, so I can brew my beloved pot of coffee. Drink coffee, start to wake up, and then realize that my to-do list is way longer than I had remembered. Make a new to-do list, and get working in 6 different directions. Maybe 12. Work all day, stopping at some point to eat boring leftovers out of fridge. Have a startling realization at the end of the day that it’s 6:00, and I have forgotten to shop for or plan dinner. Start throwing something together so we can eat before 7:00. Force myself to stop working after dinner, so I can chill with my wonderful husband. Next morning, repeat…

So that is my typical day. Glamorous, isn’t it? I have to laugh though, because I love what I do, and I wouldn’t change it for anything. It just gets kind of crazy sometimes. Like right now, for instance. I have been working on two cookbooks at the same time. It wasn’t planned that way, but hey, the best laid plans, right? Fortunately one book is done, and the other is slowly coming together. Then, because I must like things to be a little cray cray, I decided to start a new business. Some of you may have heard me mention this recently, but I am in the process of launching a new baby. The business is called Julie’s Original, and we will have a line of delicious, gluten-free and vegan baking mixes. I can’t wait to fill you in on all of the details really soon.

Now, since I know that I’m not alone with busy work days, I thought that it would be fun to share one of my go-to quick dinner recipes with you. The recipe is from my cookbook Vegan Diner, and is a super quick, healthy and delicious chili. I love to serve this chili over baked potatoes (either Russets or sweet potatoes), along side a pan of cornbread, or over oven-baked crispy French fries. You could even serve it on top of polenta, or stuff it into corn tortillas. The possibilities are endless.

I’d love to hear what you make for quick, weeknight dinners.

xo Julie

Quick And Hearty Chili
I think that everyone needs a great, quick chili recipe in their repertoire. This is that recipe. It tastes rich and flavorful, as if it has been simmering on the stovetop for hours. In reality, it only takes 15 minutes to simmer, and you have a perfect pot of chili, ready to grace your table with some homemade cornbread.
Makes 4 Servings

1 tablespoon olive oil
1/2 onion, chopped
3 cloves garlic, minced or pressed
1/2 bell pepper, any color, finely chopped
1 1/2 cups water
2 cans kidney beans, rinsed and drained
1 15 ounce can diced tomatoes, pureed or tomato puree
1 tablespoon gluten free tamari or soy sauce
1 tablespoon plus 1/2 teaspoon regular chili powder
1 tablespoon dark cocoa powder
1 1/4 teaspoons ground cumin
1 teaspoon dried oregano
1 teaspoon fine sea salt
1/2 teaspoon smoked paprika
1/2 cup TSP or TVP (textured soy or vegetable protein)

In a large saucepan, add olive oil and heat over medium high heat. Add the onions and garlic, and cook, stirring occasionally, until the onions are starting to soften and turn golden, about 5 to 6 minutes. Add the bell pepper and cook, stirring, for another 3 minutes.

Add the water, and reduce the heat to medium low. Add the beans, pureed tomato, soy sauce, chili powder, cocoa, cumin, oregano, salt and paprika, stirring well. Bring the mixture to a simmer. Stir in the TSP, and reduce the heat to low. Add more water as needed.

Let the chili simmer over low heat for 15 minutes. Adjust the seasonings to taste and serve.

Recipe adapted from Vegan Diner, by Julie Hasson, 2011, Running Press

Share and Enjoy:
  • Twitter
  • Facebook
  • Digg
  • StumbleUpon
  • del.icio.us
  • Yahoo! Buzz
  • Google Bookmarks
  • FriendFeed
  • Tumblr
  • Identi.ca
  • Print
  • email
  • Add to favorites

{ 3 comments }

Gluten-Free Focaccia Bread

Last week I found myself really missing focaccia bread something fierce. It feels like it’s been ages since I last sunk my teeth into a nice chewy, flavorful piece of focaccia. That’s probably because it has been. And up until now, I wondered if it was something that I’d ever get to enjoy again.

Thankfully, I came across a focaccia recipe that looked really promising, and sometimes you’ve just got to go with promising. Especially when you are focaccia-deprived, and ready to beg, borrow or steal, in order to fill that toothsome, chewy, bread craving. For those of you who are gluten-free, I know you know what I’m talking about.

Anyway, back to that focaccia recipe. It was really good. I made the recipe almost exactly as written (and even made two batches, because my friend Kittee was coming over for lunch, and she is gluten-free too). The only thing that I did differently was to bake the bread for 30 minutes. With gluten-free baking, I’ve found that it usually works best to err on the side of slightly over-baking, as there’s nothing worse than a stripe of under-baked rubbery dough on the bottom. Next time I will probably bake it in a cast iron skillet, just because I like to roll that way, and it will probably contribute to a really nice crust. The bread was delicious, and I think that you could adapt it a bunch of different ways. Next time I make it I’m going to press pitted olives into the top, along with the rosemary. It would also be scrumptious with sliced Roma tomatoes and garlic, or fully baked, and then topped with caramelized onions, olives and thyme. Just remember that it needs to cool before eating. That just seems to be the one caveat of gluten-free baked goods and bread. The texture is best once they’ve cooled.

So here’s the link to the focaccia recipe (here). And, if you make it, I’d love to hear what you think, or what changes you made to it. The bread is super-quick and easy to make. It takes about 5 minutes top to mix, 30 minutes to rise and 30 minutes to bake. Shoot, that’s faster than running to the store to buy a pricey loaf of mediocre gluten-free bread.

Share and Enjoy:
  • Twitter
  • Facebook
  • Digg
  • StumbleUpon
  • del.icio.us
  • Yahoo! Buzz
  • Google Bookmarks
  • FriendFeed
  • Tumblr
  • Identi.ca
  • Print
  • email
  • Add to favorites

{ 4 comments }

We Have A Winner!

We have a winner for the cookbook giveaway. Congratulations Kelly! Please email me your shipping address and full name at blog@everydaydish.tv, at your earliest convenience.

Share and Enjoy:
  • Twitter
  • Facebook
  • Digg
  • StumbleUpon
  • del.icio.us
  • Yahoo! Buzz
  • Google Bookmarks
  • FriendFeed
  • Tumblr
  • Identi.ca
  • Print
  • email
  • Add to favorites

{ 0 comments }

My Newest Book!

My Newest Book!

Looking for deliciously easy veg recipes and how-to videos? Check out Everyday Dish!

Copyright 2003 - 2012 Julie Hasson. You can link to this site as much as you like, but please don't use any content or photographs without my permission. Thank you!